Ok, i've made LOTS of progress this past weekend!
1. Changed the speakers to Kicker speakers (4" and 6.75" respectively). These are the sizes that will give you the "closest" fit. (I removed the speakers and compared with a variety of sizes at various stores - Fry's electronics, Walmart, my local car audio shop, etc. I got yelled at a few times for opening speaker boxes haha!)
2. Wired my old subwoofer in the trunk.
Here are my observations:
1. There are two speaker types in this system.
- Important: Car's head unit actually has the low-pass and high-pass filters built-in.
- The door speaker (4") has the "treble" (and maybe some mids)
- The kick panel speaker (6.75") has the bass.
Kick panel enclosure, 6.75" speaker:
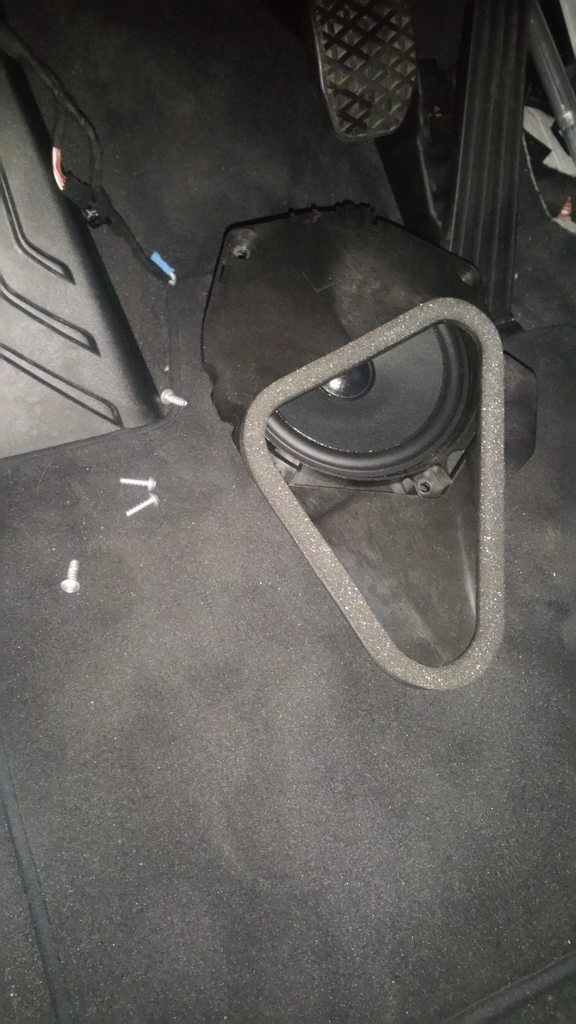
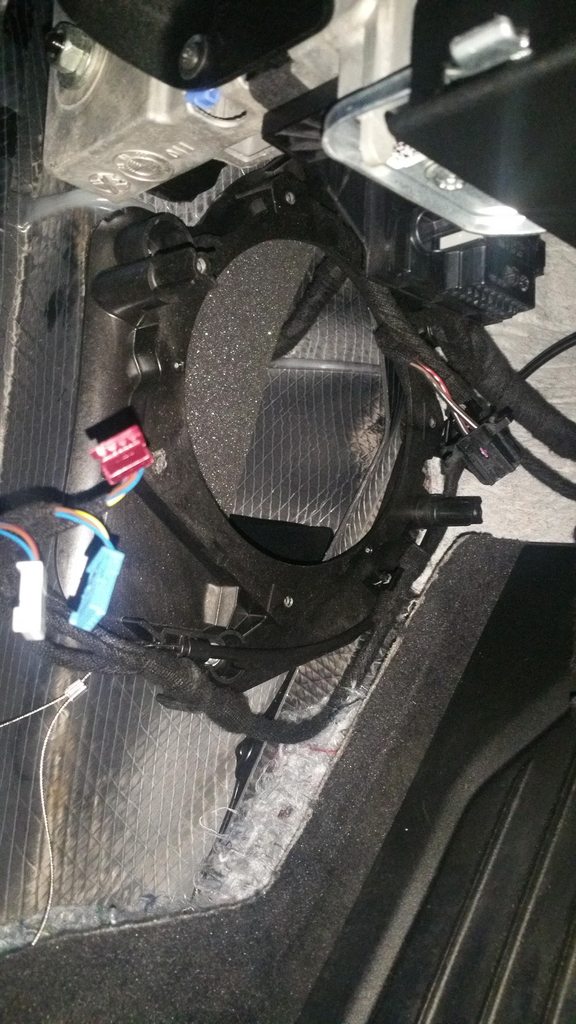
Kick panel hole:
Door speaker:
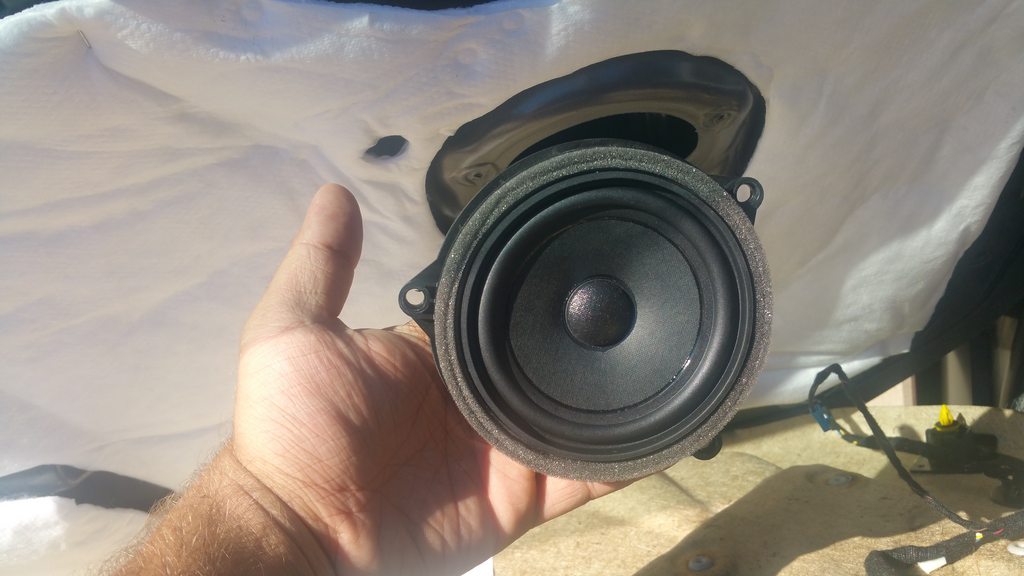
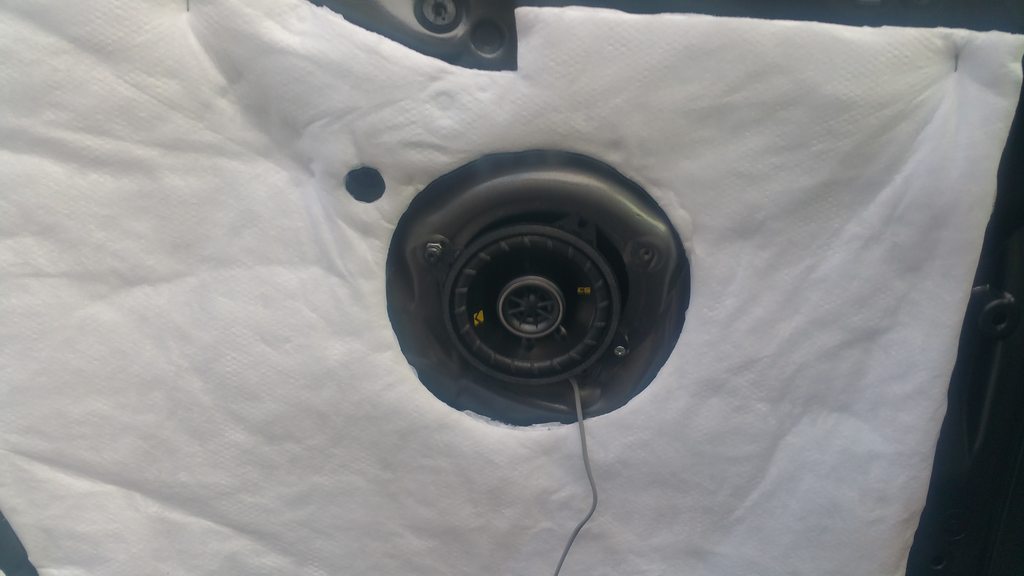
2. Speakers will NOT fit exactly as your stock speakers! There are no adapters on the market yet so you have to find creative ways to get them to stay in the door/kick panel. I used some long screws and a few nuts as separators to get the speaker in the door to stay in and clear the bracket behind it. The 6.75" speakers from Kicker (CS-something series) worked relatively well in the existing installation in the kick panel. Just keep in mind that only 3 of the 4 screws will be able to be put back. The 4th will be slightly blocked by the speaker. It's also a pain to put back as you have to hold the cover and the speaker in place with one hand while fiddling with the screwdriver in the other hand.
I thought i had a pic of the hole in the door but apparently didn't take one. There is a bracket there from the window, hence when installing the speakers, they won't go all the way in so they will require separators. Here's how i did mine. They go in more than the stock speakers but do not interfere with the window opening and closing.
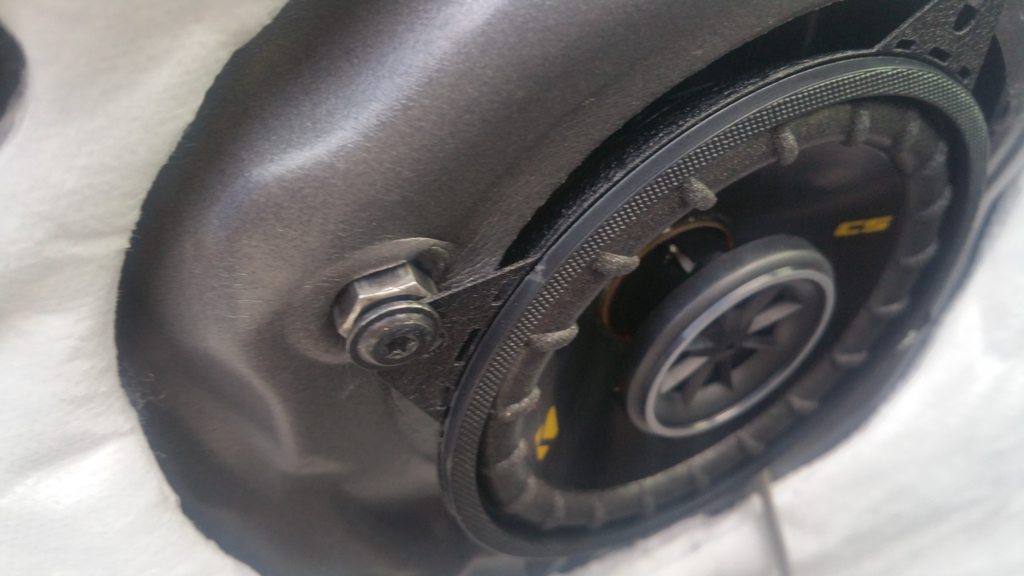
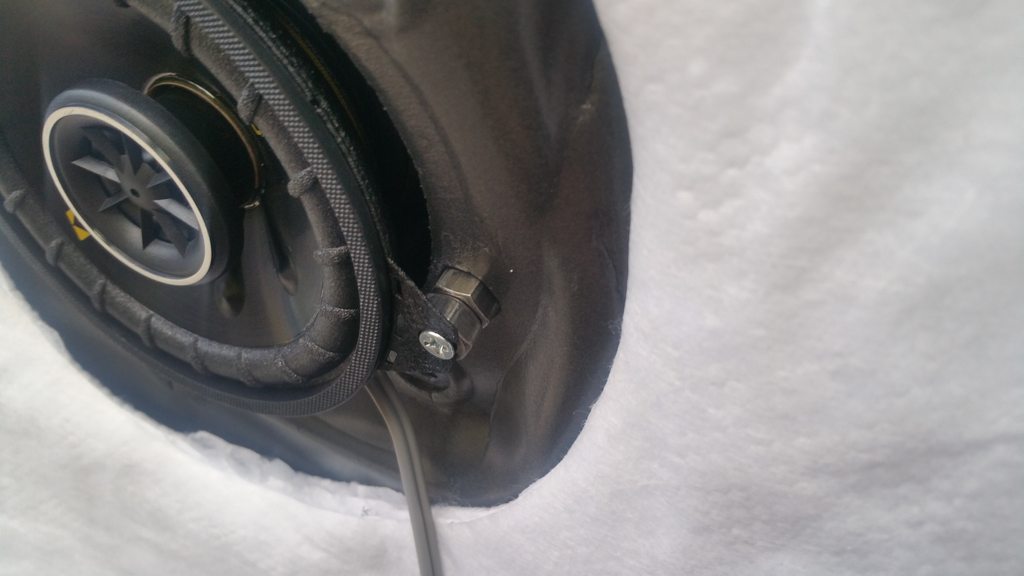
I forgot to take pics of the kick panel speaker, but that's fine, it looks the same way as the stock speaker when installed and goes in the same place without using any nuts. Like i said above, it will require to be held in place so you can get it mechanically secured (sandwiched) in between the two sections of the enclosure.
3. When wiring the speakers, the "head unit" is under the back seat. The seat gets removed by simply pulling up on the front of the seat, there are two clips holding it in, that's it.
Here are the color codes for each of the wires:
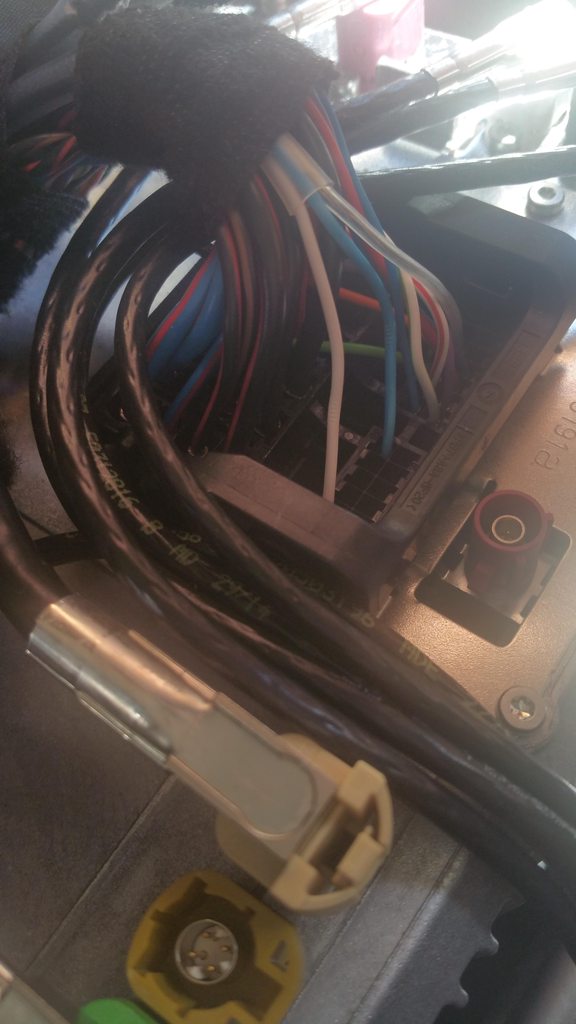
First, note that there are 3 wire sizes for the SAME COLORS! Let me explain... the thickest wires lead to the kick panel speakers (i think these are 16 AWG or so) and carry ONLY THE BASS SIGNAL! The "medium" ones seem to be around 20-22 AWG or so - these lead to the door panel speakers and carry ONLY THE MID/HIGH signal! Finally, there are even thinner wires there as well. Not sure where these go. They seem to be 24-26 AWG. My theory is that this may be low-level outputs to use with amplifiers. I will test this theory over the weekend.
Black/Brown THICKEST -> Negative front left kick panel speaker
Black/Brown MEDIUM -> Negative front left door speaker
Black/Red THICKEST -> Positive front left kick panel speaker
Black/Red MEDIUM -> Positive front left door speaker
Blue/Brown THICKEST -> Negative front right kick panel speaker
Blue/Brown MEDIUM -> Negative front right door speaker
Blue/Red THICKEST -> Positive front right kick panel speaker
Blue/Red MEDIUM -> Positive front right door speaker
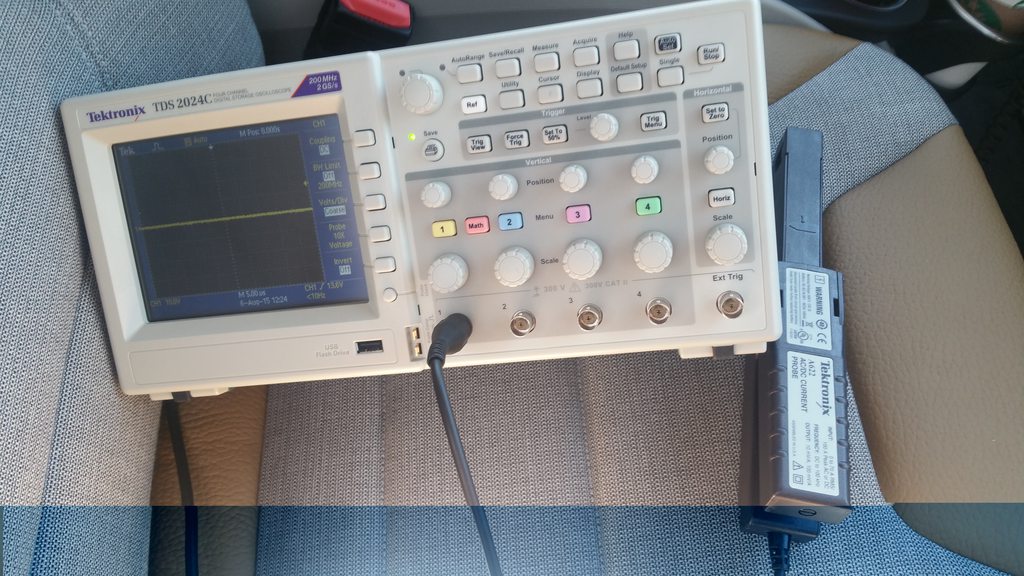
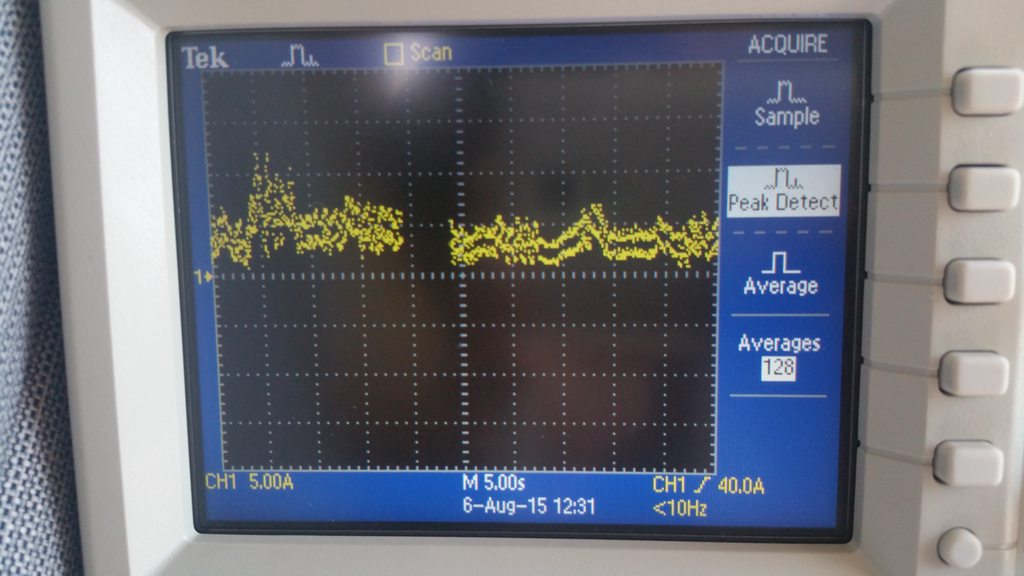
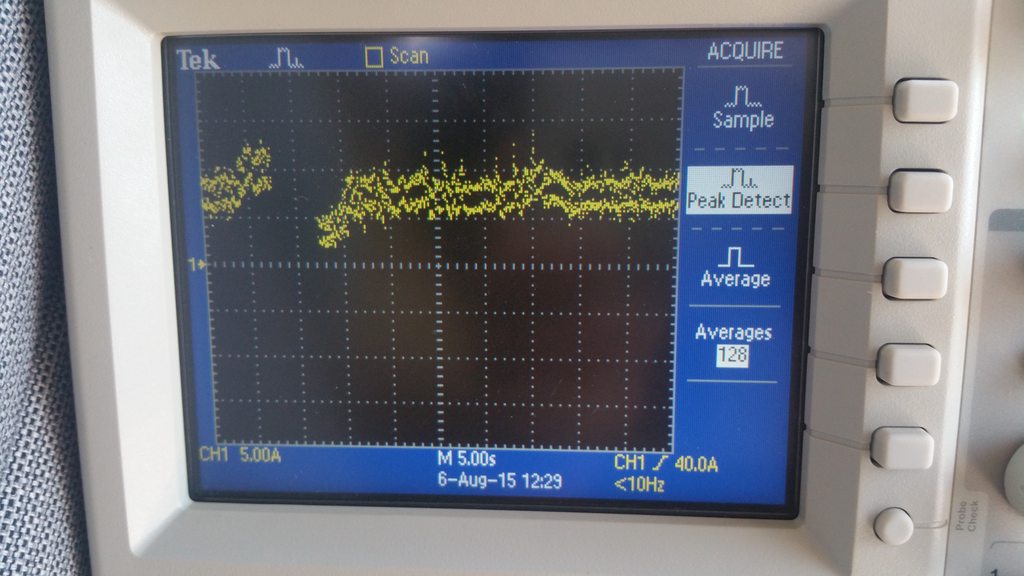
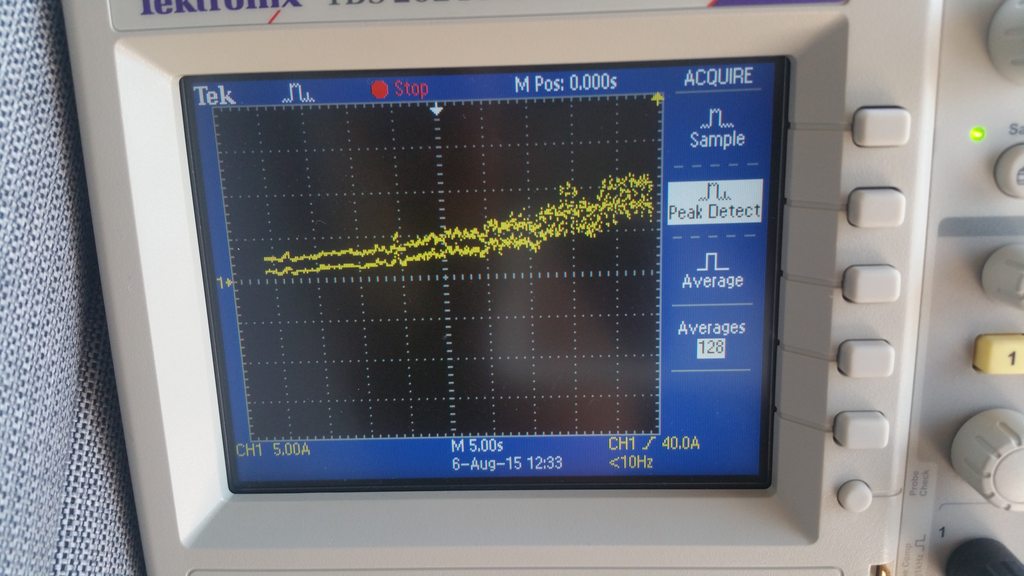
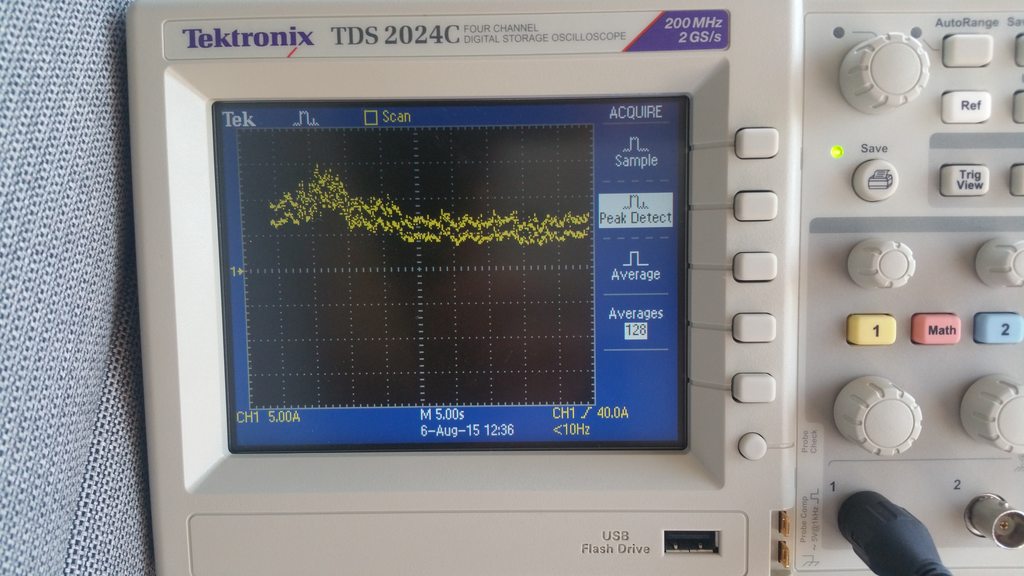
4. Wiring to amplifiers wasn't easy - the kicker amplifier i have accepts both high and low inputs. I used this 4 channel amp to power ALL 4 SPEAKERS UP FRONT! First, i had it hooked up to the leads from a RCA cable. This didn't work too well and it turns out, the RCA cable i used has a COMMON GROUND for both channels! This head unit does NOT like that. (Speakers sounded odd, and left-right channel fade didn't work very well). I physically cut the grounding out of the cable so the RCA cables only had 4 wires inside. The 5th wire that was connecting all grounds together i ended up cutting by each connector. This was a planet audio 8 AWG kit, so be aware if you purchase this as the RCA cable included has this issue. Now, you may be asking why i used 8 awg for two amplifiers on the same line. I'll explain that later, but the point is that the amplifiers together don't exceed 30A in peak power even if you blast the music more than you can withstand in the car without getting an instant headache. (Yes, i took out the oscilloscope and current probe, more on that later).
Ok, back to the 4 channel amp - so the input to this was taken from the medium sized wires coming out of the head unit, the same wires that lead to the door speakers. So i cut these, and routed the output from the head unit into the amplifier's input, and wired the OUTPUT of the amp to ALL 4 SPEAKERS - yes, i had to also cut the thick wires that lead to the kick panel speakers.
I used the thick wires that come out of the head unit to connect to the subwoofer amplifier - as these are already on a low-pass filter.
Summary:
4-channel amp
- input: medium thickness wires left and right channel
- output: both medium and thick wires leading to the speakers in the door and kick panel
Subwoofer amp
- input: thick wires that used to go to the kick panel speakers
- output: directly to my woofer box
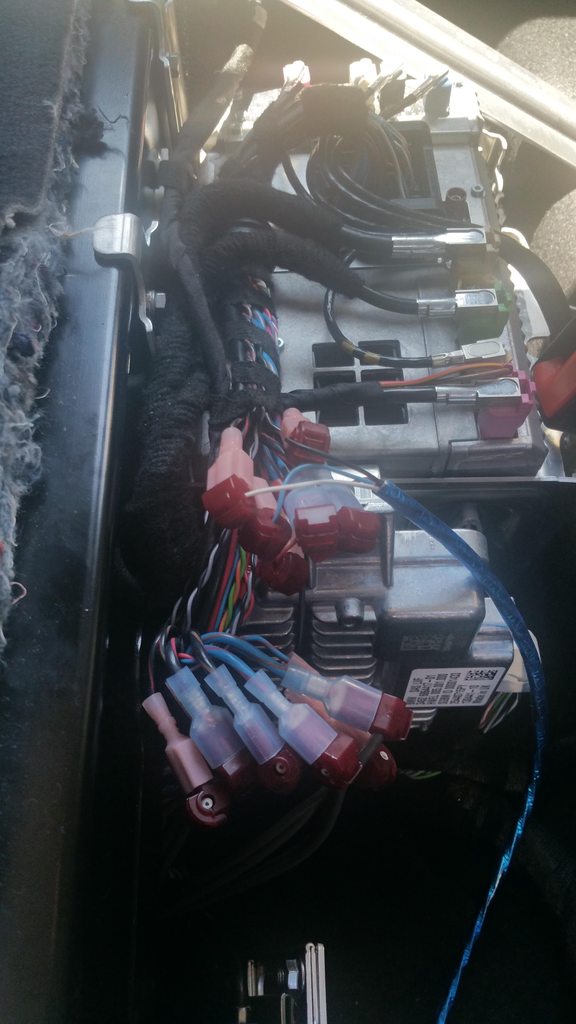
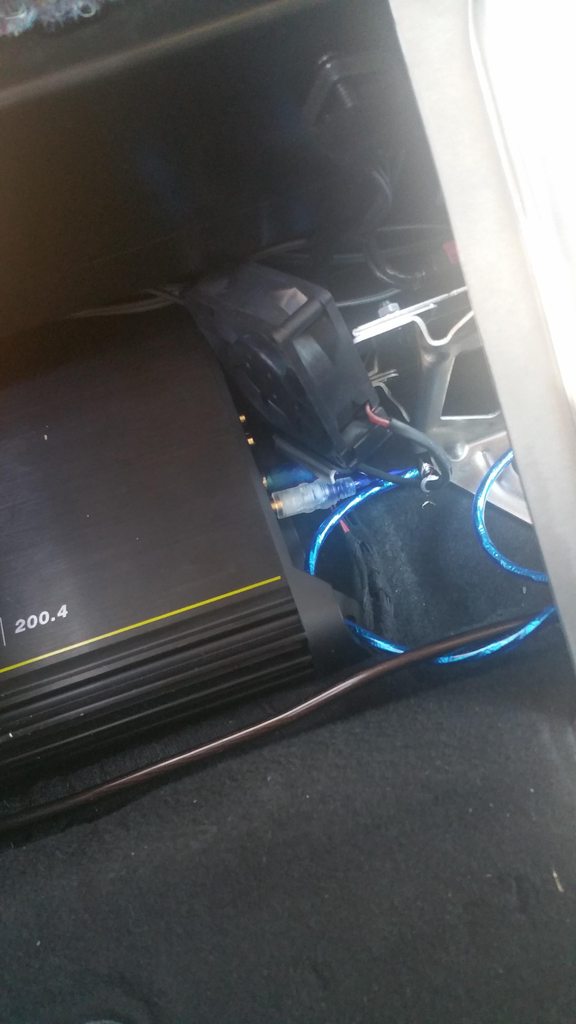
Here is a photo of how the wiring looks. The shiny blue cable is the RCA going to the 4-channel amp. The lower connectors are hooked up to the amp output and lead to the speakers. I took this photo before wiring the subwoofer.
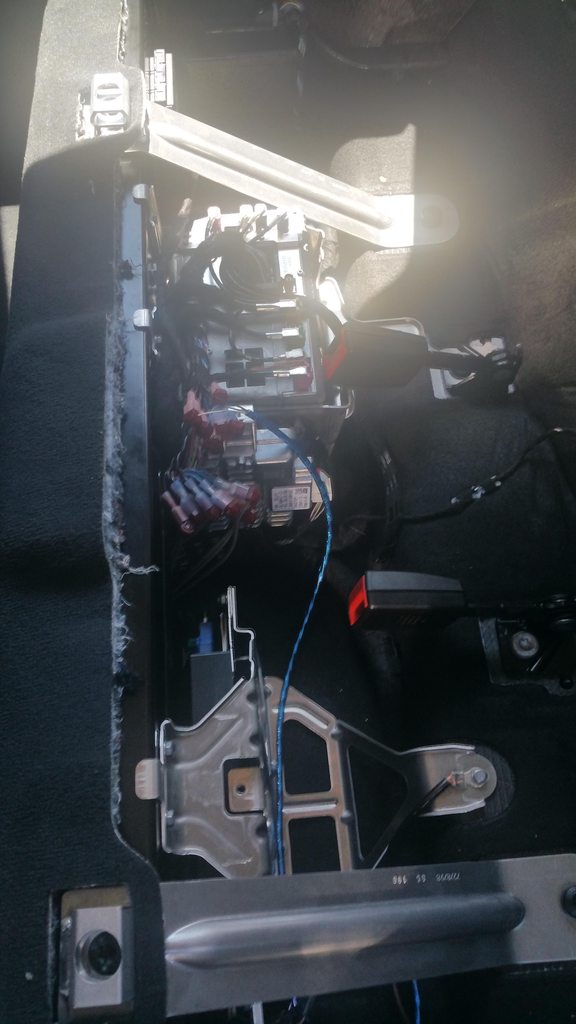
Location of kicker amp:
Note that i had to bend the fan a little bit out of the way for the RCA cables to fit in properly.
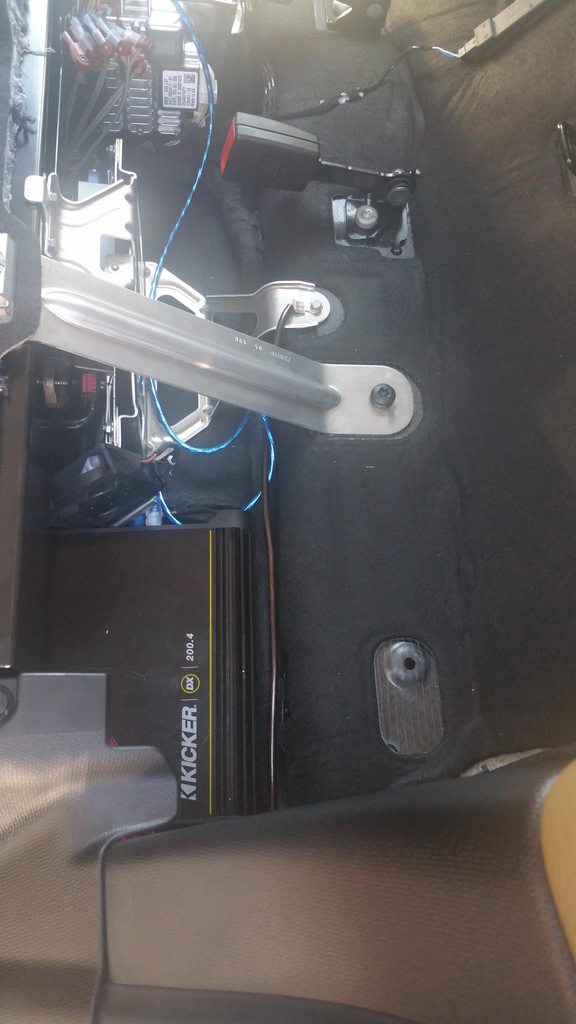
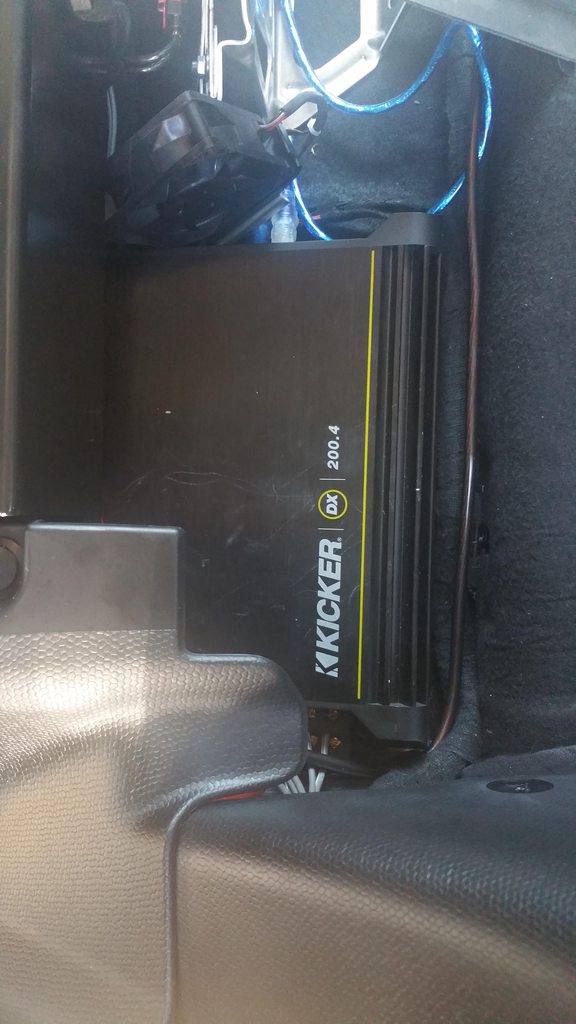
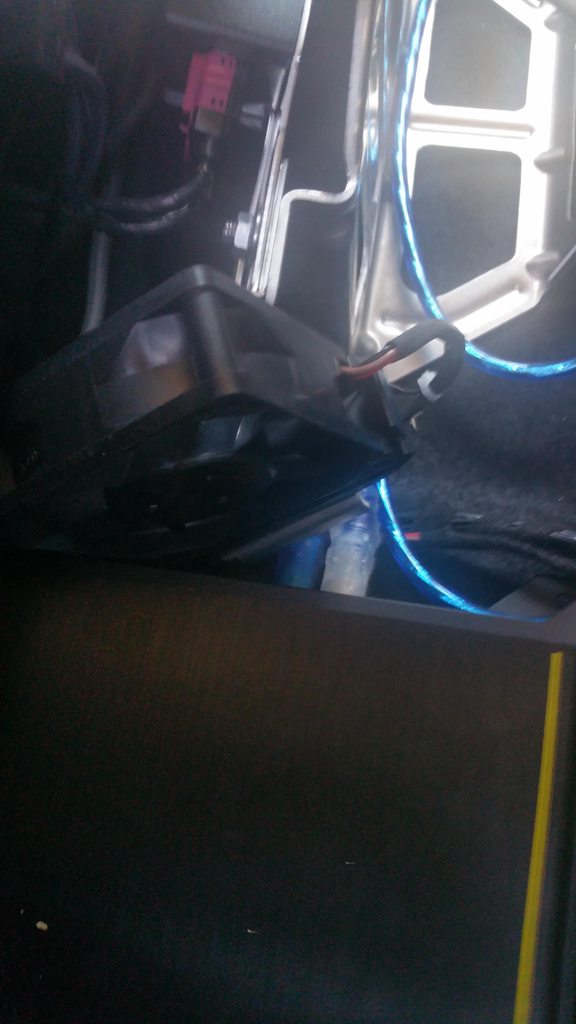
Note that i removed the styrofoam support for the left side of the seat to be able to fit the amp. I don't have anyone too heavy sitting in the back seat, and as a 200 lbs guy, i sit on that side of the seat and nothing happened, it's still quite sturdy even without the support.
5. Door panel removal instructions:
- At the top, where you pull the door from, to close it, there is a black piece of plastic (As you grab the door to pull it closed, the back of your hand is almost touching this piece). Take this out by pulling out from the top of it. There are two clamps at the top, then it slides right out. Remove the two screws behind this piece.
- Behind the door opening latch, there is a round piece of plastic - pull this from the bottom and it slides out. There is one screw behind it that needs removed.
- Once the three screws above are out, pull from the top of the door, gently (from the top-end of the door, opposite of the mirror). There are plastic clips on sides and top. The bottom is hinged, so after you release sides and top of door, gently pull up and door will come out.
Here's a shot of the door released from the plastic clips and before pulling up to unhinge it:

6. Kick panel speaker removal instructions - this is time consuming as you have to remove basically about half of the panels in the car. You should start by taking the covers off driver side (panels you step on when you get in the car - pop them up but not all the way, then slide to one side to get them off the clips - DO NOT PULL TOO HARD or you risk breaking the clips!), then take off the panel above the pedals (passenger side has the fuse box so you can't remove that there), then the center cover, directly under the dashboard, in the center, then the entire lower dashboard (comes off as one piece, there are two screws behind the center cover that hold it in). Now remove the two screws holding the right kick panel - and remember there are some switches to disconnect. Repeat for left side (no switches here). There's also a clip holding the kick panels in. Finally, now there's access to the speakers - remove the 4 screws that hold the front cover and take the speaker out.
IMPORATNT: DO NOT REMOVE THE WIRE FROM THE SOS SPEAKER WHEN TAKING OUT THE COVER ABOVE THE PEDALS! It will trigger an error and SOS will be disabled for a while. If will eventually reset, but you won't be able to use it until it does. Took 2 days for it to reset on my car. Basically, DO NOT do what i did in this next photo. I left the speaker there and disconnected wire. You should remove speaker and keep wire connected:

Panel above the driver pedals:

Center cover being removed:

This pic shows the center cover removed, exposing the two screws that hold the lower dashboard in.

Couple shots of the lower dashboard being removed:


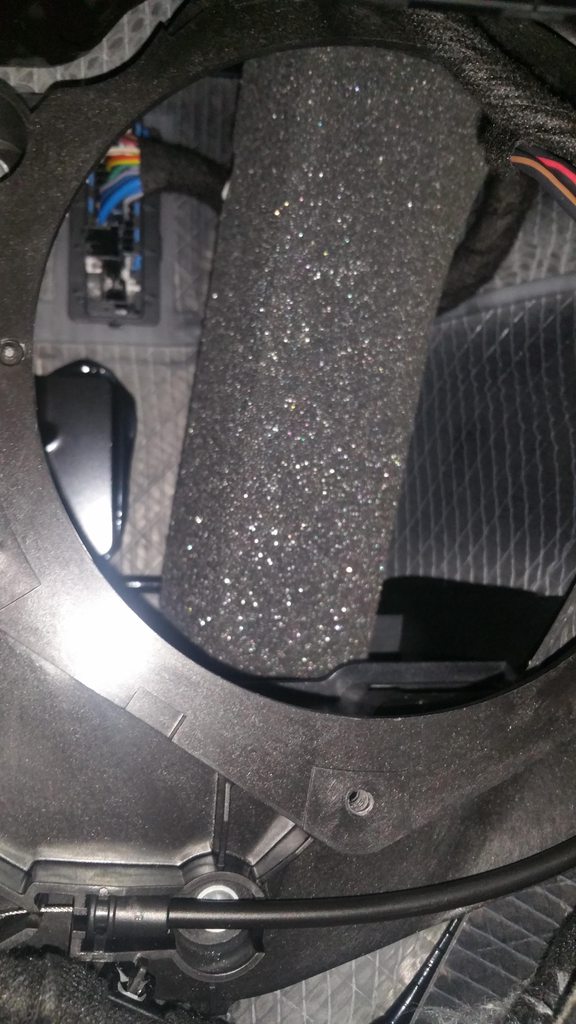
Note that there is plenty of room behind these speakers, so if you want to add 6.75" subwoofers, you definitely can - here's a pic of the hole:

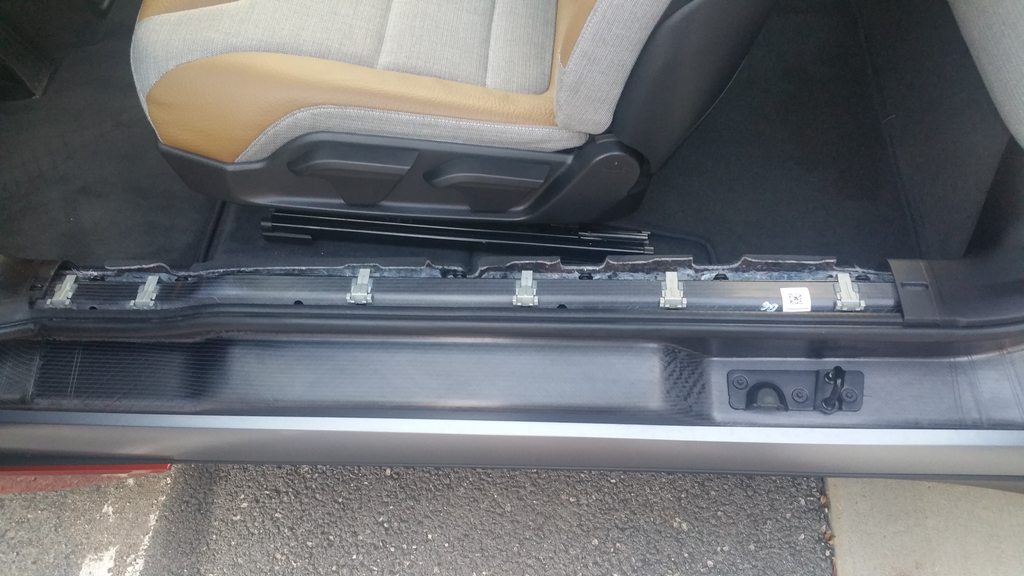
Some more pics:

1. Changed the speakers to Kicker speakers (4" and 6.75" respectively). These are the sizes that will give you the "closest" fit. (I removed the speakers and compared with a variety of sizes at various stores - Fry's electronics, Walmart, my local car audio shop, etc. I got yelled at a few times for opening speaker boxes haha!)
2. Wired my old subwoofer in the trunk.
Here are my observations:
1. There are two speaker types in this system.
- Important: Car's head unit actually has the low-pass and high-pass filters built-in.
- The door speaker (4") has the "treble" (and maybe some mids)
- The kick panel speaker (6.75") has the bass.
Kick panel enclosure, 6.75" speaker:

Kick panel hole:

Door speaker:

2. Speakers will NOT fit exactly as your stock speakers! There are no adapters on the market yet so you have to find creative ways to get them to stay in the door/kick panel. I used some long screws and a few nuts as separators to get the speaker in the door to stay in and clear the bracket behind it. The 6.75" speakers from Kicker (CS-something series) worked relatively well in the existing installation in the kick panel. Just keep in mind that only 3 of the 4 screws will be able to be put back. The 4th will be slightly blocked by the speaker. It's also a pain to put back as you have to hold the cover and the speaker in place with one hand while fiddling with the screwdriver in the other hand.
I thought i had a pic of the hole in the door but apparently didn't take one. There is a bracket there from the window, hence when installing the speakers, they won't go all the way in so they will require separators. Here's how i did mine. They go in more than the stock speakers but do not interfere with the window opening and closing.


I forgot to take pics of the kick panel speaker, but that's fine, it looks the same way as the stock speaker when installed and goes in the same place without using any nuts. Like i said above, it will require to be held in place so you can get it mechanically secured (sandwiched) in between the two sections of the enclosure.
3. When wiring the speakers, the "head unit" is under the back seat. The seat gets removed by simply pulling up on the front of the seat, there are two clips holding it in, that's it.
Here are the color codes for each of the wires:

First, note that there are 3 wire sizes for the SAME COLORS! Let me explain... the thickest wires lead to the kick panel speakers (i think these are 16 AWG or so) and carry ONLY THE BASS SIGNAL! The "medium" ones seem to be around 20-22 AWG or so - these lead to the door panel speakers and carry ONLY THE MID/HIGH signal! Finally, there are even thinner wires there as well. Not sure where these go. They seem to be 24-26 AWG. My theory is that this may be low-level outputs to use with amplifiers. I will test this theory over the weekend.
Black/Brown THICKEST -> Negative front left kick panel speaker
Black/Brown MEDIUM -> Negative front left door speaker
Black/Red THICKEST -> Positive front left kick panel speaker
Black/Red MEDIUM -> Positive front left door speaker
Blue/Brown THICKEST -> Negative front right kick panel speaker
Blue/Brown MEDIUM -> Negative front right door speaker
Blue/Red THICKEST -> Positive front right kick panel speaker
Blue/Red MEDIUM -> Positive front right door speaker
4. Wiring to amplifiers wasn't easy - the kicker amplifier i have accepts both high and low inputs. I used this 4 channel amp to power ALL 4 SPEAKERS UP FRONT! First, i had it hooked up to the leads from a RCA cable. This didn't work too well and it turns out, the RCA cable i used has a COMMON GROUND for both channels! This head unit does NOT like that. (Speakers sounded odd, and left-right channel fade didn't work very well). I physically cut the grounding out of the cable so the RCA cables only had 4 wires inside. The 5th wire that was connecting all grounds together i ended up cutting by each connector. This was a planet audio 8 AWG kit, so be aware if you purchase this as the RCA cable included has this issue. Now, you may be asking why i used 8 awg for two amplifiers on the same line. I'll explain that later, but the point is that the amplifiers together don't exceed 30A in peak power even if you blast the music more than you can withstand in the car without getting an instant headache. (Yes, i took out the oscilloscope and current probe, more on that later).
Ok, back to the 4 channel amp - so the input to this was taken from the medium sized wires coming out of the head unit, the same wires that lead to the door speakers. So i cut these, and routed the output from the head unit into the amplifier's input, and wired the OUTPUT of the amp to ALL 4 SPEAKERS - yes, i had to also cut the thick wires that lead to the kick panel speakers.
I used the thick wires that come out of the head unit to connect to the subwoofer amplifier - as these are already on a low-pass filter.
Summary:
4-channel amp
- input: medium thickness wires left and right channel
- output: both medium and thick wires leading to the speakers in the door and kick panel
Subwoofer amp
- input: thick wires that used to go to the kick panel speakers
- output: directly to my woofer box
Here is a photo of how the wiring looks. The shiny blue cable is the RCA going to the 4-channel amp. The lower connectors are hooked up to the amp output and lead to the speakers. I took this photo before wiring the subwoofer.


Location of kicker amp:
Note that i had to bend the fan a little bit out of the way for the RCA cables to fit in properly.


Note that i removed the styrofoam support for the left side of the seat to be able to fit the amp. I don't have anyone too heavy sitting in the back seat, and as a 200 lbs guy, i sit on that side of the seat and nothing happened, it's still quite sturdy even without the support.
5. Door panel removal instructions:
- At the top, where you pull the door from, to close it, there is a black piece of plastic (As you grab the door to pull it closed, the back of your hand is almost touching this piece). Take this out by pulling out from the top of it. There are two clamps at the top, then it slides right out. Remove the two screws behind this piece.
- Behind the door opening latch, there is a round piece of plastic - pull this from the bottom and it slides out. There is one screw behind it that needs removed.
- Once the three screws above are out, pull from the top of the door, gently (from the top-end of the door, opposite of the mirror). There are plastic clips on sides and top. The bottom is hinged, so after you release sides and top of door, gently pull up and door will come out.
Here's a shot of the door released from the plastic clips and before pulling up to unhinge it:

6. Kick panel speaker removal instructions - this is time consuming as you have to remove basically about half of the panels in the car. You should start by taking the covers off driver side (panels you step on when you get in the car - pop them up but not all the way, then slide to one side to get them off the clips - DO NOT PULL TOO HARD or you risk breaking the clips!), then take off the panel above the pedals (passenger side has the fuse box so you can't remove that there), then the center cover, directly under the dashboard, in the center, then the entire lower dashboard (comes off as one piece, there are two screws behind the center cover that hold it in). Now remove the two screws holding the right kick panel - and remember there are some switches to disconnect. Repeat for left side (no switches here). There's also a clip holding the kick panels in. Finally, now there's access to the speakers - remove the 4 screws that hold the front cover and take the speaker out.
IMPORATNT: DO NOT REMOVE THE WIRE FROM THE SOS SPEAKER WHEN TAKING OUT THE COVER ABOVE THE PEDALS! It will trigger an error and SOS will be disabled for a while. If will eventually reset, but you won't be able to use it until it does. Took 2 days for it to reset on my car. Basically, DO NOT do what i did in this next photo. I left the speaker there and disconnected wire. You should remove speaker and keep wire connected:

Panel above the driver pedals:

Center cover being removed:

This pic shows the center cover removed, exposing the two screws that hold the lower dashboard in.

Couple shots of the lower dashboard being removed:


Note that there is plenty of room behind these speakers, so if you want to add 6.75" subwoofers, you definitely can - here's a pic of the hole:


Some more pics:




![300W Car Power Inverter 12V to 110V,PiSFAU DC to AC Car Plug Adapter Outlet with Multi USB[24W USB-C] /USB-Fast Charger(24W) Car Inverter,Car Charger for Laptop Vehicles Road Trip Essentials](https://m.media-amazon.com/images/I/41-KedJShYL._SL500_.jpg)


